
A step-by-step guide to installing a fence panel
Looking to boost your garden’s privacy or enhance your outdoor space’s appearance without overspending? With the right tools, preparation, and methods, you can install a professional-standard fence in just a weekend.

Whether you’re completely new to landscaping, looking to transform your backyard, or simply want to secure your home, this step-by-step guide expertly explains how to install a fence panel.
Contents:
- Pre-installation checks
- Dig the post holes
- Install the fence posts
- Install the fence panels
- Install the post caps
- Post-installation checks
- Apply preservative or paint
- FAQs
A step-by-step guide to fence panel installation
Pre-installation checks
Step 1: Check the boundary's location
Unsure where your fence should be erected? Whether you’re starting from scratch or replacing an existing fence, it pays to check the boundary location.
You can do this by reviewing the property’s title deeds and plan – both of which can be obtained from the HM Land Registry.
Where appropriate and possible, it’s also recommended to discuss your plans with neighbours, check local regulations, and request permission from utility providers that may have underground cables or pipes running across your property.
Step 2: Determine the right time to work
Frozen winter ground is difficult to dig through to create the necessary fence post holes.
That’s why ensuring the ground conditions and weather are suitable (ideally mild, dry, and calm) for fence installation is essential.
Step 3: Obtain tools and materials required
Materials:
- Fence panels
- Fence posts – concrete or timber
- Base panels – concrete or timber
- Post caps
- Screws and fixings
- Post mix or cement
- Gravel or aggregate
- Fence cleats (metal brackets or wooden blocks depending on post material)
Tools:
- Power drill
- Measuring tape
- Concrete mixing bucket or wheelbarrow
- Spade
- Post hole digger
- Spirit level
- Rubber mallet or construction adhesive
- String line
- Stakes
- Ladder
Personal Protection Equipment (PPE):
- Gloves
- Boots
- Safety glasses
- Ear defenders
Dig the post holes
Digging post holes can help your fence stay standing for longer – especially if it’s likely to be exposed to adverse weather conditions like strong winds and rain.
Alternatively, you can also use drive-in ‘post spikes’ or ‘post shoes’ in some instances as a quicker and easier alternative to digging or concreting fence posts into place.
Step 1: Mark the fence line
Before digging the post holes, it’s important to accurately measure the distance between posts. You can do this using a tape measure, string line, and placing stakes in the ground. This will ensure the fence posts are adequately spaced and in line with one another, resulting in a stable, straight fence.
Step 2: Dig to correct depth
Using a spade or specialised post hole digger, dig the fence post holes at the measured and marked points. These holes should be around three times the post's width and at least one-third of the total post length in depth.
Step 3: Prepare the base
To properly prepare the base and support proper drainage, you’ll need to add an appropriate layer (around 10-15cm) of gravel or aggregate. If you’re installing wooden posts, this gravel will also help to prevent the wood from rotting.
Install the fence posts
Step 1: Position and level the posts
Carefully drop the fence posts into the holes and, using a spirit level, ensure they’re standing perfectly straight (also known as being vertically aligned or plumb).
Step 2: Set the posts in concrete
Next, you can set the posts in the holes either using cement or a ready-to-use post mix, such as Postcrete. Simply follow the instructions to activate the mix, pour it into the hole, and allow the concrete to fully harden around the post.
If you’re installing a fence on a concrete surface, you should use appropriate fixings or post supports instead.
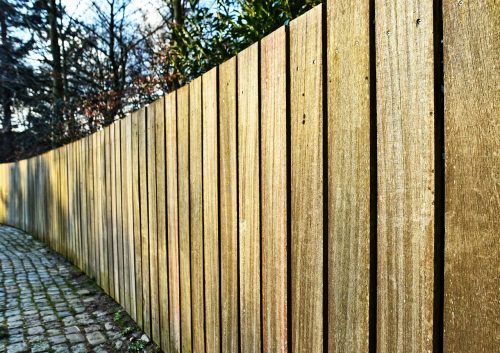
Install the panels
Step 1: Add base panels, if required
While not always necessary or desired, base panels (also known as gravel boards) are made from timber or concrete and are used to lift the fence panels off the ground, helping to shield them from moisture and rot.
Both types of base panels, whether concrete or wood, can be easily slipped into slot-in (‘H’-shaped) fence posts. However, to secure wooden base panels with standard wooden fence posts, you’ll need to screw wooden fence cleats (blocks) to the posts and then fix the board to them.
For concrete fence posts, metal brackets (typically push-in two-pin cleats) are used. These cleats are bolted into pre-existing holes in the fence posts.
Step 2: Secure the panels to posts
Whether you’ve selected trellis, bow top, or featheredge boards, your chosen fence panels can then be added and secured to the posts. Depending on the post and panel material, these posts can be secured via brackets or direct fixings, such as clips, nails, or screws.
Alternatively, if you’ve used ‘H’-shaped fence posts, the fence panels can be simply slotted in from above like the base panels.
Step 3: Monitor panel alignment
Checking the alignment, level, and straightness as you go with help from a spirit level, you should work along the fence line panel by panel until the fence is complete.
Install the post caps
Once you’ve installed the fencing, you can turn your attention to the finishing touches which includes fitting the fence post caps and, if desired, the panel capping, too.
Step 1: Choose your preferred post cap style
Available in a wide range of different materials, colours, and styles, there are plenty of post caps to explore. Whether you opt for a flat, acorn, ball, or pyramid post cap, these additions can make all the difference to the overall appearance and character of the fence.
Step 2: Affix the caps to the posts
Various methods can be used to affix the caps to the posts including a special construction adhesive, rubber mallet, or screws.
Post-installation checks
It may be tempting to walk away after that last fence panel has been put into place, but conducting some final checks can give you peace of mind and save you from future repairs. These post-installation checks should focus on examining the overall sturdiness and alignment of the fence.
Step 1: Ensure each post is perfectly straight and secure
You can check the vertical alignment and sturdiness of each post by using a spirit level and applying some physical pressure, ensuring they don’t move.
Step 2: Check each panel is straight and secure
Just like the fence posts, the straightness and steadiness of the panels should also be examined. You can do this by pushing directly on the panels to check for any excessive movement or looseness and using a spirit level and string line to determine proper alignment.
Step 3: Inspect all fixings
Whether you’ve used screws, nails, or brackets to hold the fence panels firmly in place, you should carry out a visual inspection of the fixings to check that they are not loose or protruding.
Apply preservative or paint
Step 1: Choose a preservative, paint, or stain
If you’ve opted for a timber fence, we recommend applying either a wood preservative, paint, or stain to keep it looking good and standing strong for as long as possible.
Step 2: Apply to fence panels and posts
We recommend following the manufacturer’s instructions when it comes to applying your chosen preservative, paint, or stain. However, in many cases a suitable brush or sponge will suffice.
FAQs
In the UK, fences of two metres in height (as measured from the ground level on your side of the fence) don’t require planning permission. However, there are some exceptions to this rule - for example, if the fence is next to a highway used by vehicles, they cannot be more than one metre tall.
Contrary to popular belief, there’s no blanket rule for fence ownership in the UK. Instead, responsibility is determined by the property’s title deeds or title plan and the Land Registry.
In the UK, the property’s title deeds or title plan should indicate who owns the fence. A ‘T’-mark indicates sole responsibility while a ‘H’-mark is used to show shared ownership of the fence.
Timber, concrete, and metal fence posts are the most common options in the UK. While concrete and metal posts boast a longer lifespan and greater durability, timber is often more affordable and commonly used for aesthetic reasons.
Gravel boards are designed to lift fence panels off the ground, helping to prevent moisture damage and rot.
A high-quality fence, composed of pressure-treated timber panels, should last between 10-15 years or more with proper installation and maintenance. However, more durable concrete and metal fencing solutions can last significantly longer – at around 20 years.
Explore our range of high-quality fencing products
Now you know how to build a fence, whether you’re looking for greater privacy, clearer boundaries, or stronger physical security measures, we can help you to install the fence you need.
Forward Builders’ Supplies stocks a range of reliable, high-quality fencing solutions.
This includes replacement panels for rotten or cracked fencing, sturdy fence posts, gravel boards and concrete base panels, and a selection of essential fencing accessories.
For more expert advice regarding the fence installation tools and materials available at Forward Builders’ Supplies, speak to our helpful team today.
Have a question about one of our fencing products?
Simply give us a call on 0151 357 1035!
Or, email your enquiry to hello@forwardbs.co.uk.


The information below is required for social login
Login
Register
Fill in the form below to create your new account